How to Install Rollerski Ferrules onto the Pole
Rollerski poles producers use conical shafts and therefore the ferrule (rollerski ferrule) mounted onto roller skiing pole comes with the tapered inner shape which is determined by the outer dimensions of the bottom part of the shaft – the very end of the pole and a few centimeters above it, to be more specific.
Ferrules and rollerski pole tips get worn out with use and all kilometers of training, or they even break, so there comes the time when they need to be replaced.
Replacing rollerski ferrules is not difficult, but it requires a certain amount of time, some tools and a place with room temperature.
Before mounting the new rollerski ferrule, the old one needs to be removed and we suggest the step-by-step procedure as written below.
1. Removal of the existing rollerski ferrule
Preparation
To perform a successful ferrule removal next tools are needed:
- hot air gun (or hairdryer)
- pliers (with wider cutters/pipe grip)
- sand paper (grade 600)
- work gloves
Sometimes it’s good to use a nitro cleaner/thinner to clean the shaft-end – it depends on what type of glue was originally used for ferrule installation.
Note: If a hot air gun is not available, hair dryer can be used instead.
Steps of rollerski ferrule removal
Ferrule removal starts as follows:
- warm up the shaft (including existing ferrule) by dipping it into hot (not boiling!) water or warming it up with a hot air gun or hair dryer – in all cases the temperature should reach max. 60 °C
- use the pliers to pull the old ferrule from the pole shaft
- wait for the shaft to cool down and then remove the leftovers of old glue with sand paper (grade 600)
- clean the shaft properly before mounting a new ferrule replacement (use nitro cleaner if needed)
2. Installing the new rollerski ferrule
Determining the needed ID of the new rollerski ferrule
After the removing of the old rollerski ferrule the new one has to be installed.
Prior to its installation inner diameter (ID) of the newly chosen ferrule has to be verified in order to be sure that it will fit onto the bottom pole shaft nicely.
Step 1: Measuring the taper of the pole shaft
Check the dimensions of shaft at the bottom of the pole by following instructions below (use the caliper to be truly precise):
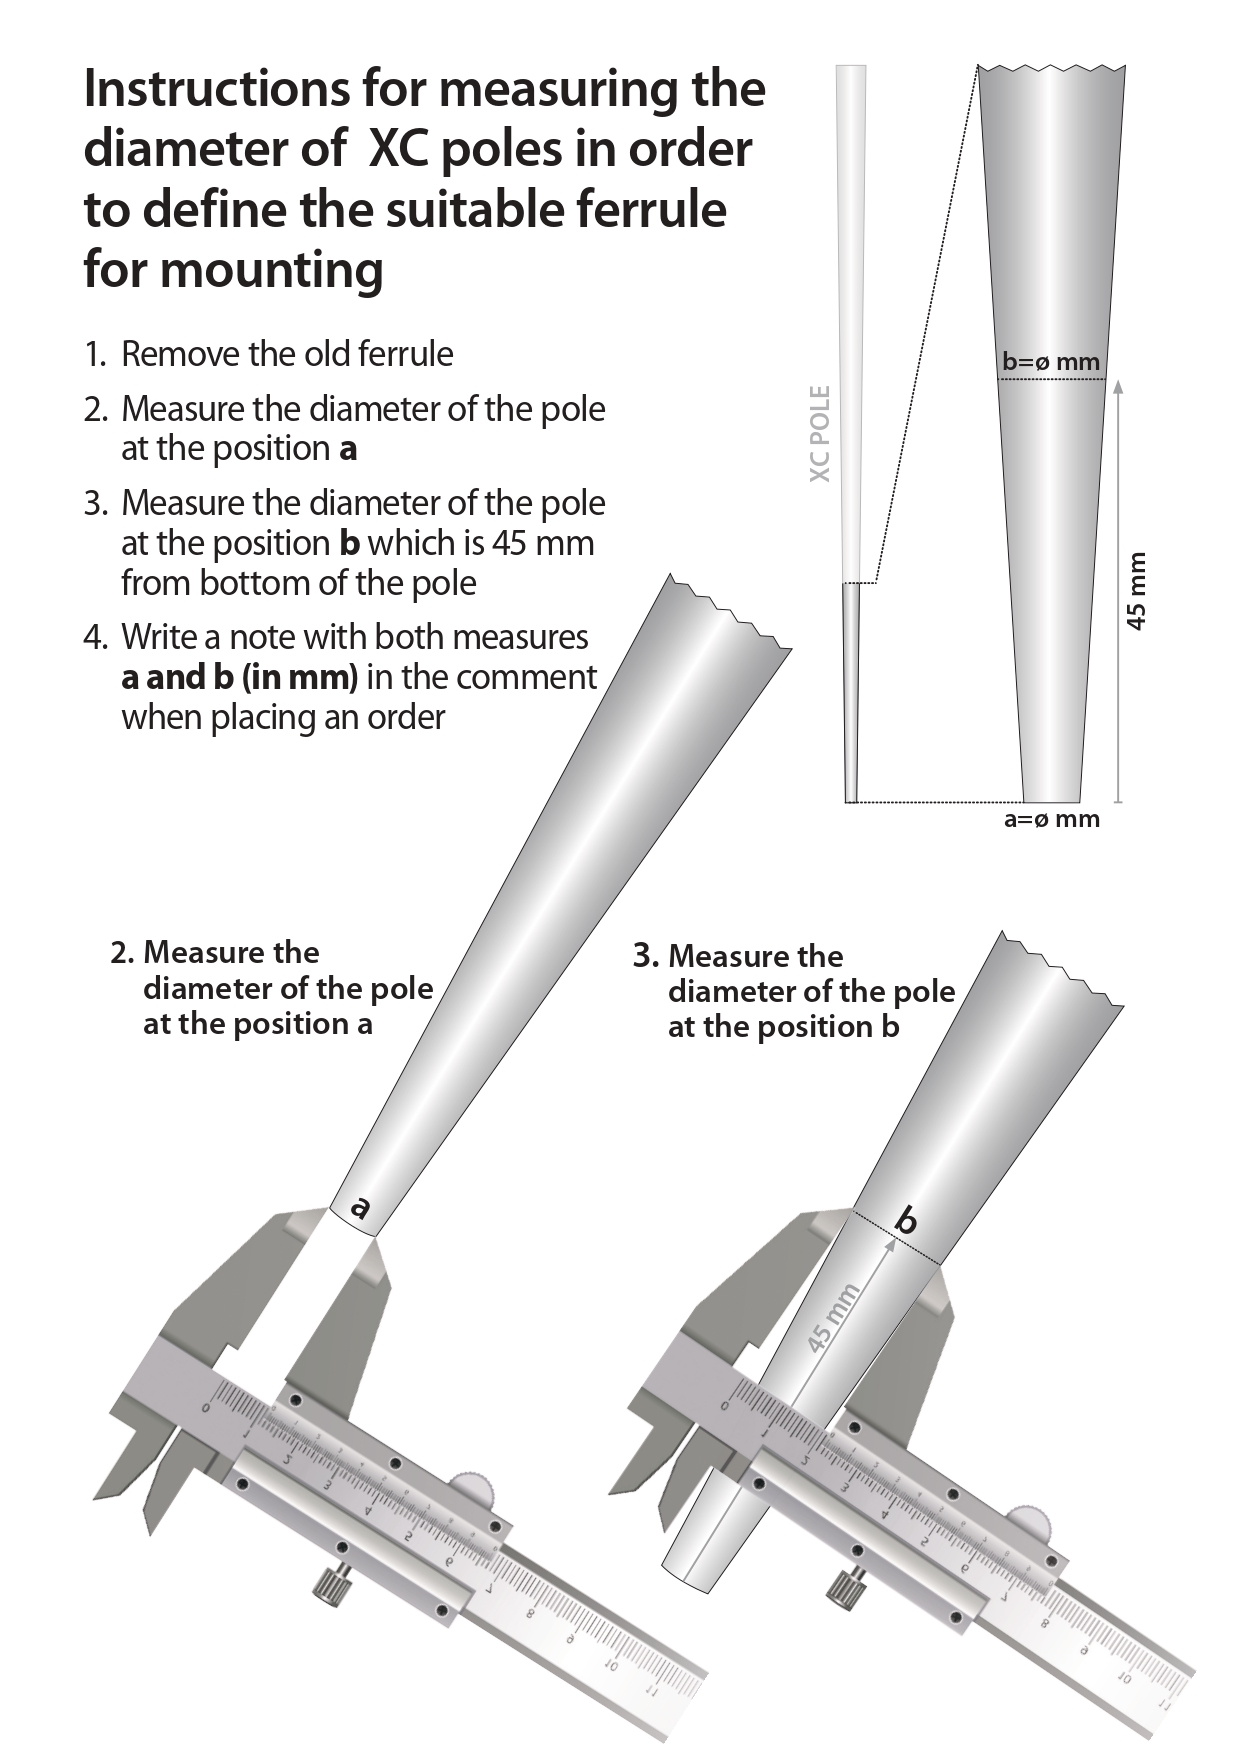
Step 2: Finding the suitable ferrule
After taking the measurements of the shaft on both positions review the inner diameters of available rollerski ferrules and find the compatible one for the shaft taper.
Rollerski ferrules come with different IDs and are offered in our online shop.
They all are accompanied with cross section drawings for easier search of the right ferrule dimension.
Installation of the new rollerski ferrule
After confirming that the dimensions of the new rollerski ferrule fit the pole shaft the mounting can start:
- make sure that the room temperature is above 21°C
- for easier installation warm up the rollerski ferrule with a hair dryer to make it a bit more 'elastic' (don't use hot air gun with temperature higher than 60°C or boiling water)
- in case the fitting dimensions are not optimal and the ID of the ferrule is a bit bigger compared the the OD of the shaft, apply a generous amount of hot melt glue directly into the ferrule just before mounting it - all this with the intention to fill the space between the shaft and ferrule walls where needed
- use hair dryer (or hot air gun with limited T= max. 60°C) to warm up the end of the shaft also – this way the glue stays hot longer and spreads everywhere needed to do the gluing job properly, plus the adhesion is much better
- IMPORTANT: when mounting the ferrule onto the shaft make sure that the end of the shaft is pushed to the very bottom of the rollerski ferrule (there should be no empty space left; this empty space would represent a ’soft spot’ for potential breakage of the ferrule later during the use)
- mount the rollerski ferrule onto the shaft while the glue is still hot and soft and make sure that you push (punch) the end of the shaft right to the end of the inside of the ferrule
Caution:
Wear work gloves during the whole process of the ferrule installation to protect yourself from hot pole shaft and hot melt glue.
Note:
In case a small Nordic basket will be mounted onto the rollerski ferrule also, it should be installed after the glue settles and dries completely (leave it at least a couple of hours to cool down and dry).
And a kind suggestion:
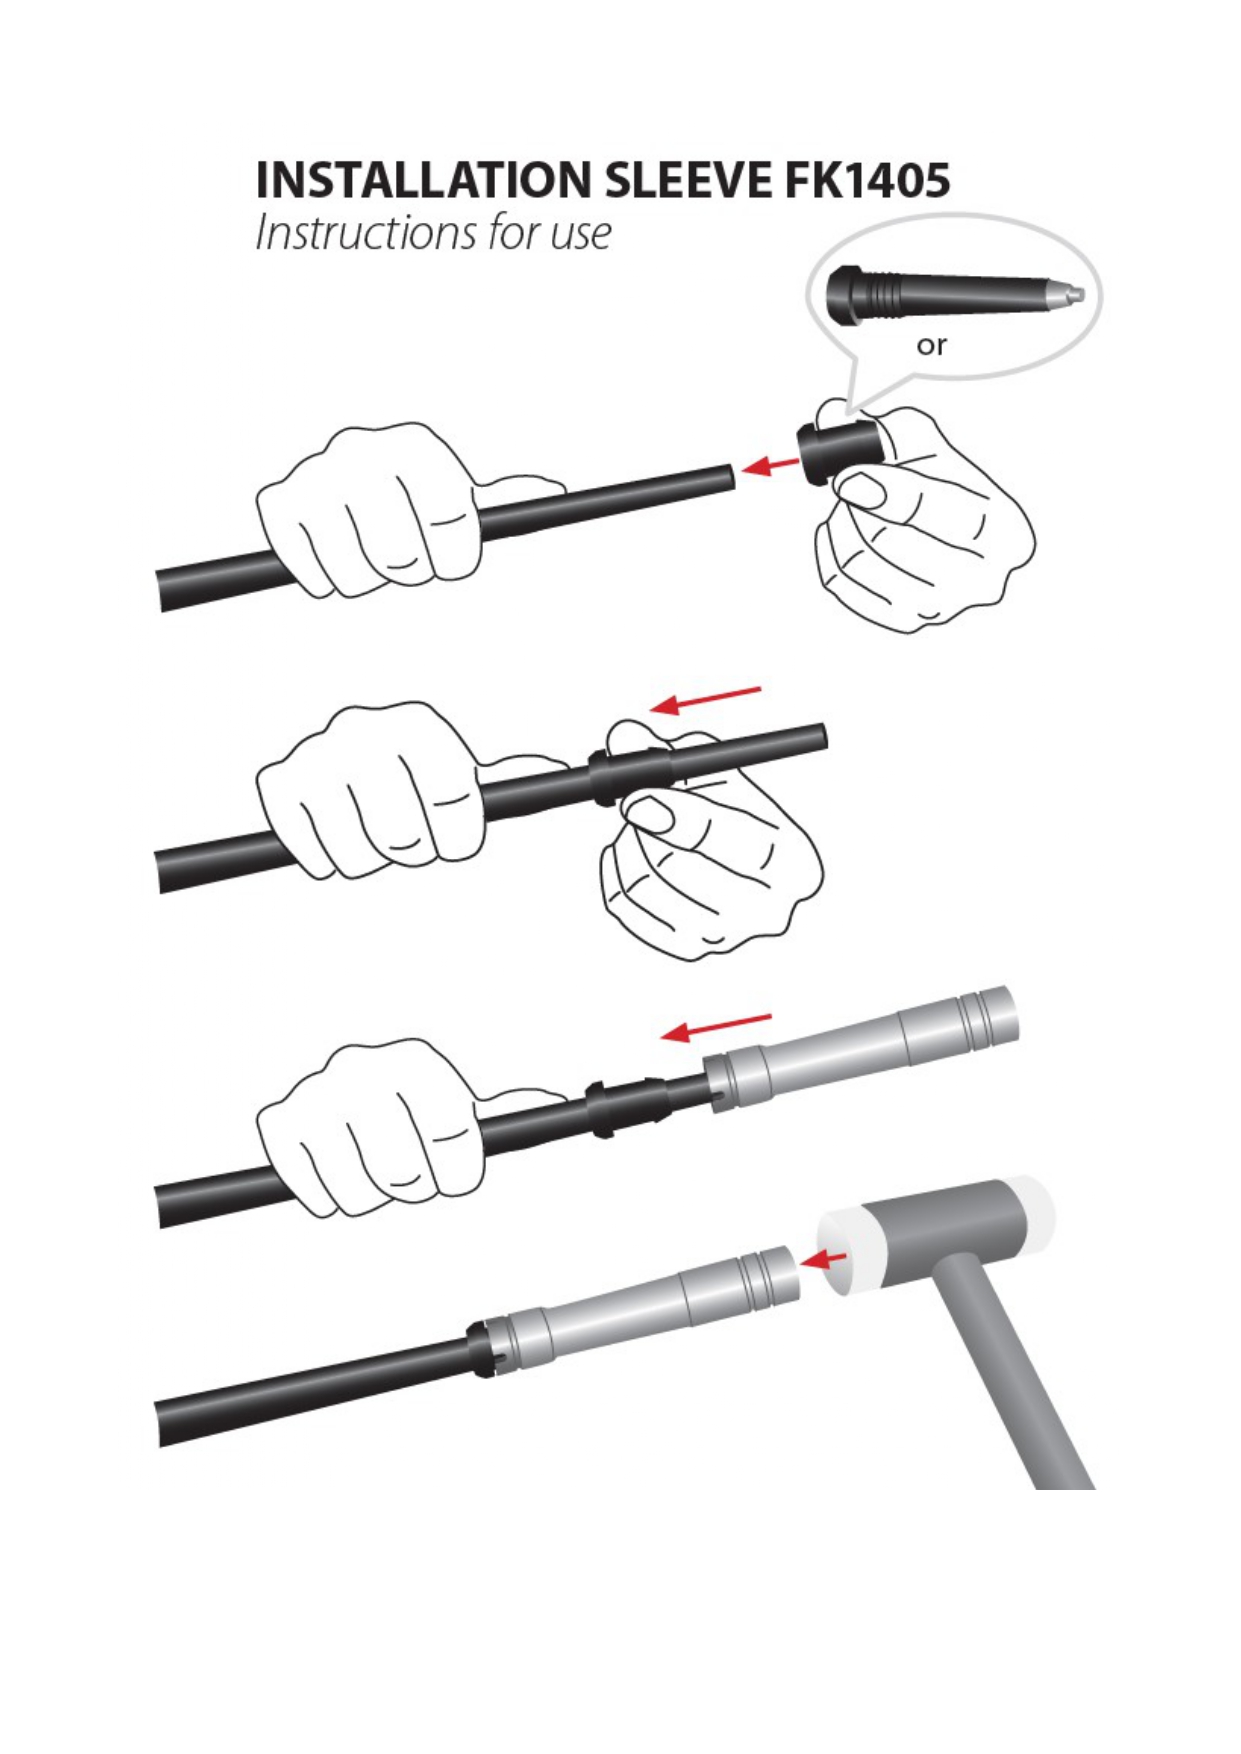
For easier and faster installation of the rollerski ferrule (or any kind of other ferrule for tapered pole shafts) a special tool called Installation sleeve can be used: